I have been feeling really sick the past few days. Down with a cold, plus I've finally gone for my IUI (intrauterine insemination) last Friday. I was so nervous being my first time but it all went well. I have to self administer 4 more injections the next 2 weeks before going back for a blood test to see if it's successful. The needles have grown in size dramatically! These new injections are actually pragnancy hormones used to regulate your body for a baby if successful. I'm really scared of these needles now cos they are huge and the first one was really painful. Not looking forward to my second needle this Wednesday :(
This week's nail art is ultra sweet and cute. I keep looking at them after it's been completed. As usual, being a gel overlay plus tons of nail art, it took me nearly 5 hours to complete (while watching Korean drama) hehe :)
I'm going to show you another way you can use acrylic and craft scissors to create 3D lace for your nails. I made this tutorial a few days before painting it on my natural nails.
Using my newly purchased gel colours, I mixed some cream and dusty pink colour.

Sorry about this photo, I can't seem to rotate it.

Using the 2 colours above, create a reverse french mani.

Using a bright red, white and green acrylic paint, draw some tiny roses randomly.

Cover with a layer of gel top coat and cure for 2 mins. See how shiny it becomes :)

For the 3D lace, you'll need an aluminum foil, white acrylic powder and a pair of craft scissors that cuts curvy design.
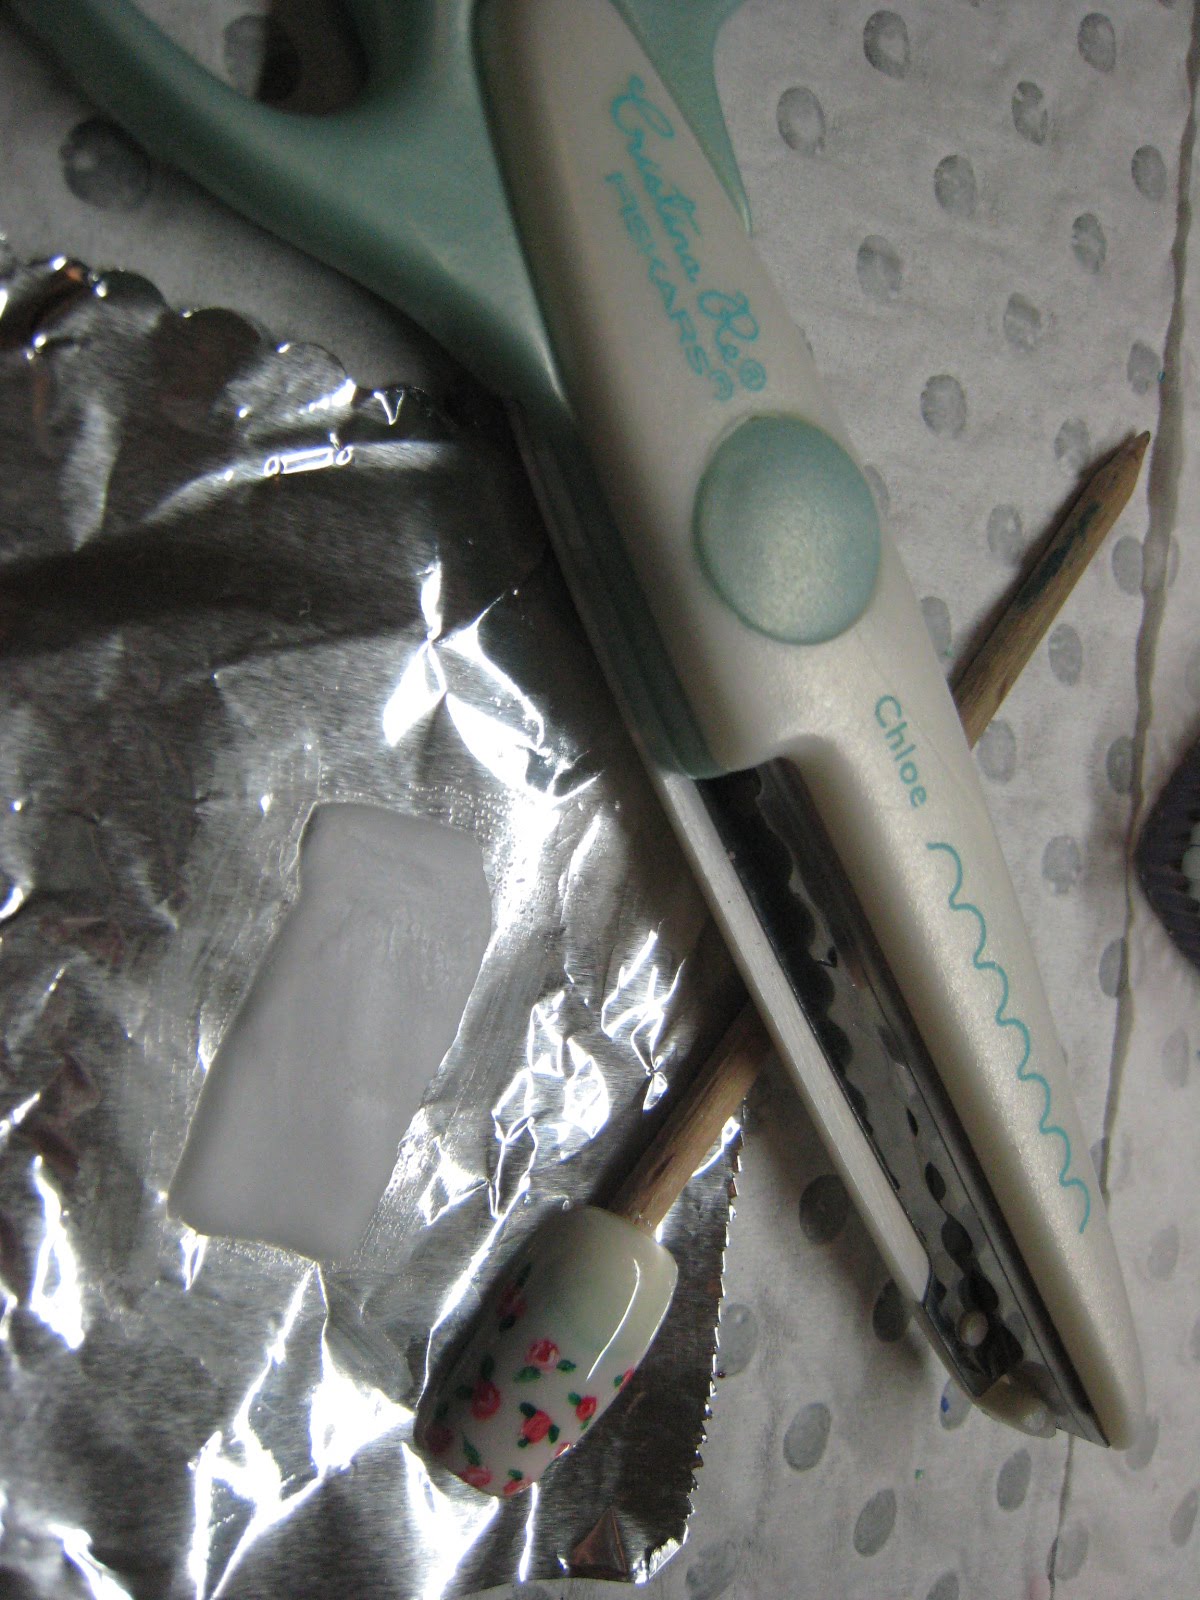
Mould a rectangle piece of acrylic on the aluminium foil. Lift the acrylic while it's still bendable and cut it on both sides length wise with the craft scissors.
You'll have to work fast or else the acrylic will be too hard and dry. Place the acrylic on the nail and bend it into shape.

Using nail glue, attach the 3D lace on the nail and cut off the excess. Add some pink dots on the top curve bits.

Using some pink 3D gel, create 3 rectangle strips and a ribbon. Space the rectangle strips out so it looks like a ribbon threading through the lace. Seal the acrylic and 3D gel with a top gel coat and cure.
Complete!


Here's the design I created on my natural nails. I did not use the 3D lace on my own nails because I was too tired after I've completed it. Instead, I covered the cream and pink joining sections with light pink pearls. Which one do you like more?

For the index and pinky, I managed to squeeze in a huge acrylic heart amd trace it with pink bullions. The pink rose on the heart is created by using 3D gels. I also used a light mint 3D gel to create some leaves around the rose. However the mint is so light it can hardly be seen.


For the right hand, I mixed a darker pink gel colour.


Fingers cross for Friday the 25th June when I will know if the IUI is successful....very nervous.
Monday, June 14, 2010 |
Category:
3D Acrylic,
3D Gel,
Gel Overlay,
Nail Art,
Pink,
Tutorial,
White
|
24
comments


