This is one of my favourite colour from the OPI Shrek series - What's with the Cattitude?

I used this lovely light blue as a base and sponged on some white and dark blue nail polish.


 Using a combination of 2 light blue, 1 yellow and 1 white acrylic powder, draw a 5 petal flower.


Draw a 3 petal flower on top of the existing flower.


 Using acrylic paint, draw some lines across the lighter blue petal and dots on the darker blue. I've also added a silver rhinestone in the center to make it look brighter.


Repeat the same flower pattern on the ring finger. I've also made a white bow on the pointer.


Add some silver, and blue rhinestones randomly on the other finger nails.


Complete! Don't you think the flower patterns look like patchwork ?


The bricks are going up fast at my new house!


We recently went on a trip south of Perth to visit the Manjimup Wine & Truffle Co. It's truffles season in Australia between May to August. If you love the smell of this beautiful but expensive fungus, you must visit this place and participate in their truffle hunt.

We feasted on this amazing gourmet delicacy during our visit and paid $9 per 3 grams to have more truffles added to our meals!


Super Yummy Juicy Steak with Pate, wrapped in puff pastry on truffle mash potato with added extra serving of truffles
 For this culinary trip to the south, I've decided try this red hot nails decked out with blings!


I've been looking around for a bright red nail colour and it was love at first sight when I saw this.  
OPI - Red Hot Ayers Rock! The red hot part was absolutely correct :)
Just a quick post today. I broke 2 of my finger nails and had to put my pre planned nail art design on hold. The nail break was quite massive so I've decided to trim down all my nails. Now that they are much shorter, I thought I'll give OPI's 'Who The Shrek Are You?' a try. I've never worn such a bright green before and I think they look so cute on short nails.


This was the first broken nail! Look how short it is now.


After 1 week wear, under filtered light - The colour looks so different!
Oh by the way, we're building our first house! It's so exciting seeing the brick work finally getting done. I've made provision for a nail art section within the house. Can't wait for it to be completed! :)
Hi everyone, I am finally back! So sorry I've been away for such a long time, as I needed a break after my failed fertility treatment. I'm all good now :) and all ready to start blogging and doing nail art once again. Big thanks to everyone who kept visiting my blog during my absence and for leaving all those kind messages.

Just an update on my previous pink roses nail design. I was one of the most long wearing set of nails I've worn. I had them on for a little more than 4 weeks. Other than my natural nails growing out, I had zero tip wear and hardly any lifting. Only down side is it took me a couple of hours removing them and it involves heaps of manual filing and using my electric nail drill! I'll need to give gel and acrylic overlay a rest for now.

Today's blog title is called 'What to do with Alice?'. You must be wondering what that means? Well, I've been asking myself this question for 2 weeks after getting my hands on OPI's Absolutely Alice. I tested the nail colour first and although I love the glitter, I find the overall colour a little bit too dark for my liking. Therefore, instead of covering my entire nail with this nail polish, I choose to only cover half of it for some of my nails. I also choose some yellow and gold to brighten it up.


These were taken on a Saturday after 3 days of wear. It's winter now in Australia and I can't get enough sunlight during the weekdays to take any photos. It's always too dark in the morning before I go to work and the sun would have already set by the time I reach home.


The moon is drawn straight onto my nails using a gold acrylic powder. I added some large round glitters to make it more shiny. The large gold and silver stars are made using clear acrylic mixed with glitter powder. It's moulded separately on a piece of aluminium foil before gluing it onto my nails.


Close up look of the large glitters I added onto the moon and starts


I have been feeling really sick the past few days. Down with a cold, plus I've finally gone for my IUI (intrauterine insemination) last Friday. I was so nervous being my first time but it all went well. I have to self administer 4 more injections the next 2 weeks before going back for a blood test to see if it's successful. The needles have grown in size dramatically! These new injections are actually pragnancy hormones used to regulate your body for a baby if successful. I'm really scared of these needles now cos they are huge and the first one was really painful. Not looking forward to my second needle this Wednesday :(

This week's nail art is ultra sweet and cute. I keep looking at them after it's been completed. As usual, being a gel overlay plus tons of nail art, it took me nearly 5 hours to complete (while watching Korean drama) hehe :)

I'm going to show you another way you can use acrylic and craft scissors to create 3D lace for your nails. I made this tutorial a few days before painting it on my natural nails. 

Using my newly purchased gel colours, I mixed some cream and dusty pink colour.


Sorry about this photo, I can't seem to rotate it.


Using the 2 colours above, create a reverse french mani.


Using a bright red, white and green acrylic paint, draw some tiny roses randomly.


Cover with a layer of gel top coat and cure for 2 mins. See how shiny it becomes :)


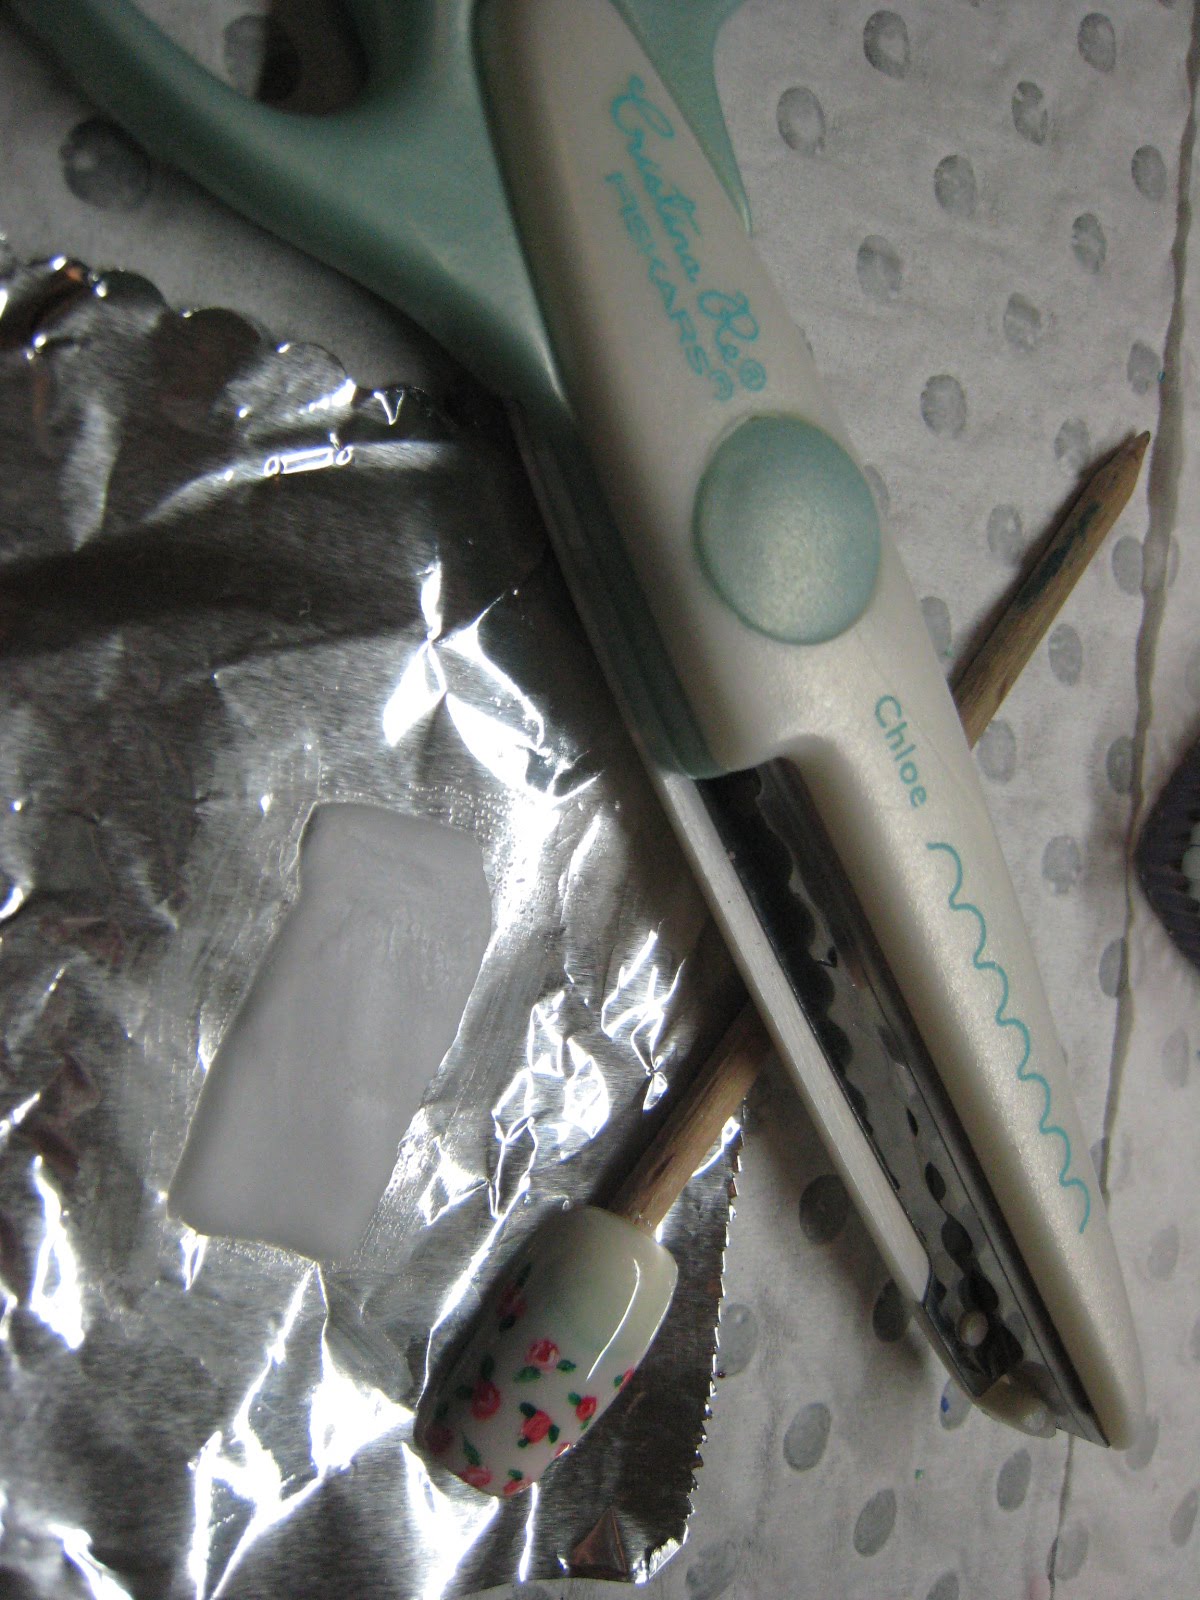
For the 3D lace, you'll need an aluminum foil, white acrylic powder and a pair of craft scissors that cuts curvy design.


Mould a rectangle piece of acrylic on the aluminium foil. Lift the acrylic while it's still bendable and cut it on both sides length wise with the craft scissors.

You'll have to work fast or else the acrylic will be too hard and dry. Place the acrylic on the nail and bend it into shape.


Using nail glue, attach the 3D lace on the nail and cut off the excess. Add some pink dots on the top curve bits.


Using some pink 3D gel, create 3 rectangle strips and a ribbon. Space the rectangle strips out so it looks like a ribbon threading through the lace. Seal the acrylic and 3D gel with a top gel coat and cure.

Complete!


Here's the design I created on my natural nails. I did not use the 3D lace on my own nails because I was too tired after I've completed it. Instead, I covered the cream and pink joining sections with light pink pearls. Which one do you like more?


For the index and pinky, I managed to squeeze in a huge acrylic heart amd trace it with pink bullions. The pink rose on the heart is created by using 3D gels. I also used a light mint 3D gel to create some leaves around the rose. However the mint is so light it can hardly be seen.


For the right hand, I mixed a darker pink gel colour.


Fingers cross for Friday the 25th June when I will know if the IUI is successful....very nervous.
The past few weeks have been so crazy. I've started my next round of fertility treatment where I have to self inject needles into my stomach daily. I've not been scared of needles but injecting it yourself is totally different! The nurses were very helpful at the clinic. They allowed me to practise injecting into a fake belly and then teach me how to do it on the real belly hahaha. I'm now an expert in self injection! Only problem every morning is to find a spot on my tummy that haven't been pricked!

2nd crazy thing is that my home phone have gone all weird. I can only make local land line calls. If I try to call a mobile phone, or to other states within the country, it doesn't work at all! I've been complaining to my provider Eftel for 3 weeks and there have been nothing done! I'm really annoyed with them.

I'm building a new house at the moment and it's really frustrating dealing with them. There's been a lot of hidden items we were not aware of. Everyone I speak to gives me a different story.

Luckily I can always 'escape' into my nail room for a few hours and just concentrate on nail art. It serves as a getaway where I can forget all my worries and just focus on something I like.

This week's nail art consists of a lot of glitter, a revisit to my 3D gel collection and a new but easy to create nail art technique.

Nail Polish Used:
1.  Butter London - Chancer
2. Shiseido Maquillage - 56

I applied Butter London Chancer on all my finger nails except on the ring finger where I used Maquillage 56.


These are the other materials required. I used some yellow and silver rhinestones, red heart shape flakes and 3D Gel to mould the roses.


First I'll show you how to make this really simple flower using the heart shape flakes. I am using 3D gel over here but you can also use acrylic. Both the 3D gel or acrylic act as a paste to hold this flower design together.

Take a blob of 3D gel and place it on your finger nails. Using a pair of pincers, arrange the hearts around the 3D gel such that I forms a 5 petal flower. Cure this under the UV lamp and repeat the same process ontop of the original flower. This time, place only 4 hearts into the 3D gel. Press some gold bullions into the centre of the gel and cure under UV lamp again. You can seal it with some gel top coat and cure it again.


Taken under my table lamp.

Under filtered sunlight.


Under filtered sunlight but brighter. I love this red, especially the glitter! Only issue I had with it was that it didn't last as long as my other Butter London nail polish. After 2 days, I could already see visible tip wear. However, with some mending and top coat I managed to wear this for 2 weeks!


This is what I did for the other fingers. I kept it simple, adding some rhinestones except for the index finger where I used the 3D gel to mould a rose. I used a creamy colour 3D gel and added a tiny amount of red to it. I found the red 3D gel too bright, therefore I also added some black gel to darken it.


I have something very cute and sweet planned for the next nail art. Stay tuned!