Showing posts with label Creative. Show all posts
After taking such a long break from nail art, these were the first set I made. It was very different working in a new room, on a new nail table and with a new table layout. You'll notice that my pictures are not as good for this post and on the next few that I'm about to publish. I'll apologise in advance. I'm was experimenting which was the best time and location to take these photos in my new house. I think I've finally figured it out. So you'll get better pictures very soon!


 When OPI's Muppet collection came out, I was madly in love with rainbow connection. The glitters come in different sizes and oh the colours are just simply beautiful! I love layering rainbow connection over another OPI nail polish from the same collection 'Designer.. De Better!'. My mom and I have been wearing it on our toe nails all summer. We can't get enough of it hehe :)


Hand Painted Roses Using Acrylic Paint


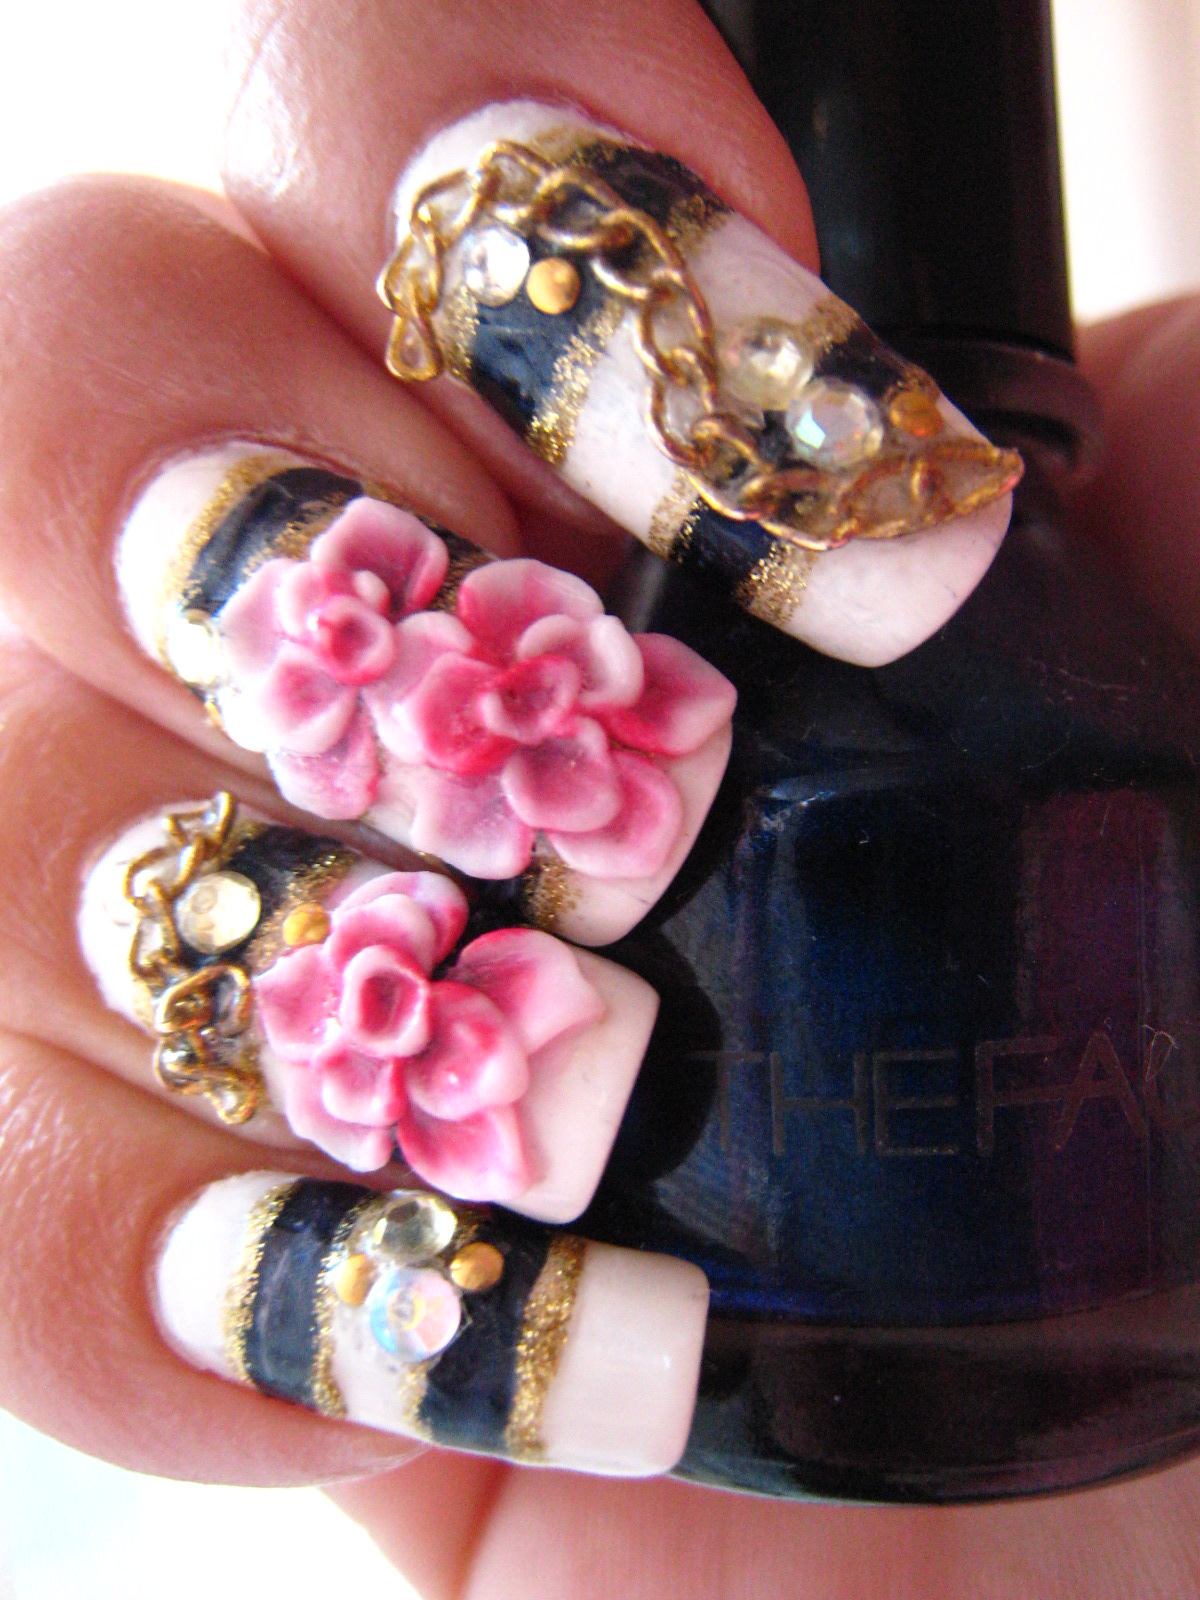
I love nautical nail designs! For some reason, I'm very drawn to this nail design and have since created 2 similar versions. The first time I created this set of nails was back in December 2010. I like it so much, I've made a similar set last week, with some slight variations. This is the first time I've worn the same design twice is such a short span of time!

It takes me approximately 4 hours to create this design. This includes removal of the previous design, reshaping and prepping the nail. The first design was created with Colour Club - Soft Chiffon  and OPI - Yoga-Ta Get This Blue!


To create this design, I coloured my nails with 3 coats of Soft Chiffon. Using a small brush, I draw 2 to 3 blue horizontal stripes, depending on nail size. Then line the stripes with gold glitter. Using white and dark pink acrylic powder, draw the 3D flowers only on the thumb, middle and ring fingers. Stick on some craft chains and rhinestones and you're done!


I used a much smaller gold chains for this nautical nail art. Not only do they look nice, they are a lot easier to wear. The bigger chains I've used previously were always getting in the way when I style my hair or wear my clothes!


This is the second set I've created last week. My nails are a bit longer which means I have slightly more room to draw on. I've also changed my nail shape and used different brands of nail polish.

2 Coats OPI - Alpine White
2 Coats CND - Studio White
The Face Shop -  BL604


There are a few things to take note of when applying these craft gold chains. After you've cut the chain length to fit the nails, make sure you close off the ends properly. If not, they can feel very sharp and will cause damage to your clothes, especially if you're wearing slik or knits.

I used to apply nail glue to my nails first before placing the chain ontop. I've since reversed this application process. Firstly, the glue will cause the gold chain to harden. If you place the chains on top of the glue, it's harder to move them around if you're not happy with the placement. Also, you want to place the chains flat, this will make them much easier to wear.


Happy New Year! 2010 really went by in a flash.I hope everyone had a great New Year celebration :)

I have a lot of projects planned for this new year. My new house is going to be ready very soon. I have so much to organise and plan before and after moving in. We're currently deciding on the wall colours and I am going through a white paint nightmare! Little did I know that there are soooo many variations of white wall paint colour. I've purchased a few sample pots and have started painting on huge pieces of cardboard. I've placed them in different rooms to see which one is most suitable. I think I have narrowed down to 3 different whites. Dulux Lexicon Quarter, Lexicon Half and White on White. I'll be using these 3 whites in different parts of the house. I hope they turn out well against the matte dark brown porcelain floors.

My uncle have kindly purchased a new cross trainer for me and we've positioned it right in front of the TV (I love watching dramas). I'll be getting fit this coming year to get my body ready for the next round of fertility treatment.

As for nail art, I've been looking around for an air brush and hope to purchase one soon. There's a lot of different designs I want to try out. At the same time I've also bought a very interesting table lamp for my nail art table. I'll be sharing it with you in my next post.

For this new year, I've decided to go for a sparkly pink nail design.

I used CND Studio White as the base. When I bought this colour, I didn't realise it's a semi sheer nail polish. To get it looking opaque, I think I must have layered more than 5 coats! Then I used Kit's Supernova and drew random large and small semi-circles on all 10 finger nails. Next, I applied medium round glitter flakes along the edges of the semi-circles and cover with top coat. Using a pink and white acrylic powder I drew the 3D flowers and added silver bullions on top. To make it more bling, I've also added a few large and small glass rhinestones. These glass rhinestones look so much better than the regular ones. They are almost as sparkly as the Swarovski rhinestones without the big price tag.


I've bought these 3D soft cane fruit wheel for ages but can't think of any interesting way to wear them.


Since the weather is now starting to get warmer, I thought of wearing something bright and sunny. I've never tried wearing so many colours before and was a bit embaressed wearing this out! What do you guys think?


These are the colours I've used. They are all new colours that I've recently bought. This is such a great way to test them all in one go!


Bloom nail polish are made in Australia and they have some very interesting colours. This one dries relatively quickily, but the brush is too small. I had to redip 4 to 5 times to cover the entire nail.


Kumquat Dahlia by Creative is a total nightmare to use! The consistancy was too watery and light and it dries extremely slowly. I thought I could safely go to bed after 1 hour. The next morning, I had a huge smudge on this nail while the rest were still intact.


Say Cheese by Mode Cosmetics. This one is a regular pharmacy purchase. It only cost me $2.50 but I was quite surprised with the colour and ease of application. Only complain is that the brush itself it a little bit too long.


Another nail polish from Bloom - Cameron. This is super easy to apply and has a light shimmer effect. I really like this colour. Will definitely wear this again.


Hook Me Up by Mode Cosmetics. This is also very easy to apply. The consistancy was quite thick and I was worried that it may not dry as fast. However, it was quite the opposite. I was pleasently suprised...


I created some acrylic flowers using paper punch. All you have to do is to smudge some acrylic onto a piece of foil and punch it through a regular craft paper punch.
After much hair pulling, I've finally managed to upload and modify a new blog template. It still needs a little more final adjustments but I do like the end result. Hope you'll like it too.

As previously mentioned I was meant to continue with my wedding theme, however I was so tired of light pastel colours, therefore I've decided to try a new technique.

I don't know what's the official name of this technique but I'll call it the Water Swirl Technique for now. I've seen this done several times before but have not try it personally. You'll have to use 2 different nail colours and drop them in one after another into a container of water. Wait for each colour to spread out before dropping the next colour. Use an orange stick to swirl the colour into your desired pattern and dip your finger nails flat down onto the surface of the water. Do this slowly or else you'll end up with bubbles. With your finger still submerged in the water, use the orange stick and remove any remaining nail polish floating on the surface of the water. Slowly lift your finger out of the water and allow to dry slightly. Use a cotton bud dipped in nail polish remover to clean up nail colours around your finger. Viola, you'll end up with some very interesting swirly patterens! I was up till 4 am doing this. It's fun but very messy at the same time. Not to mention the amount of nail polish wasted. However, I do like the look of it.


On Friday I had lots of work to complete and requested to work from home. The laptop we were given at work had it's wireless capability disabled due to security reasons. The only way to get access to the Internet is via the blue network cable. However, the one given to us at work was really short and I'm limited to work in the back room, which is the coldest in winter. Luckily I found this super long cable!

Nail design this week is really simple because 2 of my nails broke on my right hand. I originally had a 3D acrylic lace design planned, but because it is quite a bulky design it'll look a lot better on long nails. Well I'll have to wait for 3 to 4 weeks to get my broken nails long enough again. Hope I don't break any more in the meantime!


Wow my weekend's been packed with weddings and birthdays. I've lost count of the number of presents I've bought this month. I've created a few darker coloured nail art the past few weeks to welcome the winter months. I've also tried painting flowers and lines but some were not very successful :( I'm still working my way to become ambidextrous!